Using client certificates for ASP.Net Core App hosted on Azure Web App service
Recently we had to communicate with an external API featuring mutual authentication using client certificates (AKA two way SSL).
We were using ASP.Net Core hosted on Azure Web App service and had to call the API’s using HTTPClient (There is another way of enabling this on Azure using Azure Resource Manager which I will mention later).
Upload your certificate
The very first thing you will need to achieve this is a certificate. The only thing that matters when you are uploading your certificate to Azure is that it should match the domain you are using.
I’ve tried to use the default certificate but no luck since it is a wild card and Azure won’t load that in certificate store for your web app (it is a shared service).
You can upload your certificate by following the steps in this Microsoft blog post. It is very detailed with pictures for each step and easy to follow.
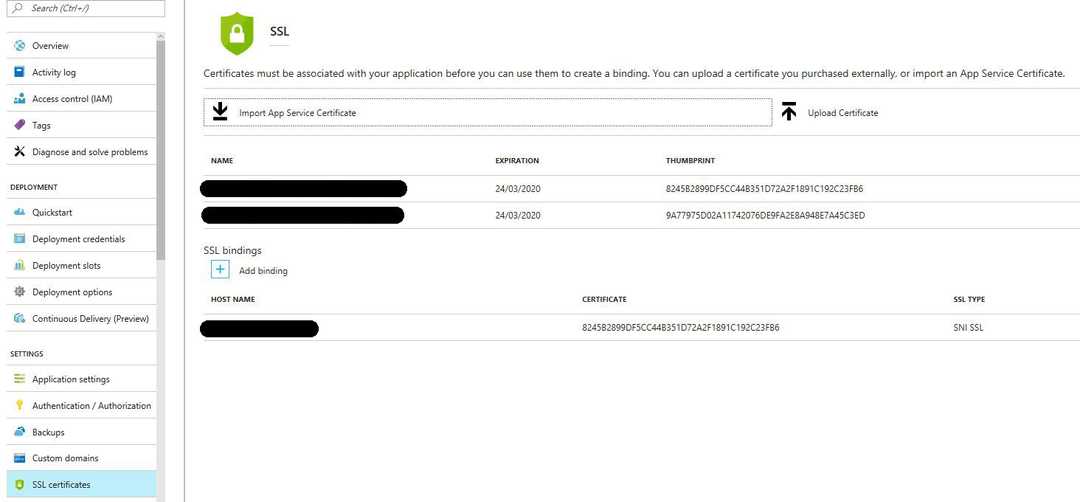
When you are finished with that all you need to do is to capture the thumbprint of your certificate which you can find on your SSL certificates menu on the Web App page.
The way we’ve implemented this is to have different certificates for each web app with its own domain and then we’ve put them in appSettings.[env].json files.
This will make our lives easier because we don’t have deal with .pfx files and their passwords, and in the other hand we don’t have to hard code any thumbprint in our code (remember that they will change when you renew a certificate at some point).
Load the certificate
Now the only thing remaining is to access the certificate inside your code. Before that you will need to let Azure know you are going to access it otherwise it won’t load them for you.
This is done using an application settings called WEBSITE_LOAD_CERTIFICATES which you can set on your application settings section.
For the value you can set either your thumbprint or * which means it will load all the available certificates. I found this blog useful about how to do this step.
Once you’ve done this, it is only the matter of loading the certificate from the store. The bellow code shows you how you can do this:
private HttpClient CreateHttpClient(IConfiguration configuration)
{
  var handler = new HttpClientHandler();
  httpClient = new HttpClient(handler);

  X509Store certStore = new X509Store(StoreName.My, StoreLocation.CurrentUser);
  certStore.Open(OpenFlags.ReadOnly);
  X509Certificate2Collection certCollection = certStore.Certificates.Find(
                             X509FindType.FindByThumbprint,
                             configuration.GetValue<string>("CertificateThumbprint"),
                             false);
  // Get the first cert with the thumbprint
  if (certCollection.Count > 0)
  {
    X509Certificate2 cert = certCollection[0];
    handler.ClientCertificateOptions = ClientCertificateOption.Manual;
    handler.SslProtocols = SslProtocols.Tls12;
    handler.ClientCertificates.Add(cert);
  }

  certStore.Close();
  return httpClient;
}The other thing to keep in mind is to provide an HTTPS address for your HTTPClient otherwise it wouldn’t be two way authentication.
Enable client certificate on Azure
The other way you can achieve this is to configure the mutual authentication on Azure itself rather than doing it manual like above. This blog post is a very good resource for doing this, however I will summarise it here as well.
All you need is this code snippet to enable it:
{
  "location": "My Web App Location",
  "properties": {
    "clientCertEnabled": true
  }
}
You will need to replace the location value with your web app location. You can update this using Azure Resource Manager as well if you are not using ARM templates.
And as mentioned in the blog post for ARM Template from Powershell, you will need to escape the @ symbol for the JSON file with a back tick `.
Also note this will enable the mutual authentication for all the services under this Web App and makes it mandatory. So if you have just a web app and you don’t want your normal clients to use a client certificate don’t use this option.


