


Integrating your SPA with Azure AD
 September 28, 2017
 11 min read
As a user I want to be able to login to system using my work account
This is one of the most famous lines in a user story in almost every project’s backlog.
However, sometimes it might be the case that you are responsible to decide which authentication mechanism to be used.
You might decide to use Azure Active Directory (AAD) and if that’s the case this post will help you to get up to speed with that process. The assumption is that you have a single page application (SPA) and are using ASP.Net Core Web API as your supporting back-end.
Also I will assume that you already have an Azure AD setup and have created an application with return URL localhost:4200. If you do not know how to do that please read this article.
Setting up the projects
We will need two projects, one for the APIs and one for the client side. I will use Angular CLI for the client side. So let’s create them. I’m also using Visual Studio 2017 but feel free to use Visual Studio Code or even command line.
After creating your solution, you will need to create a web API project targeting .NET CORE 2.0. Do not select an authentication scheme at this time since we will configure it shortly.
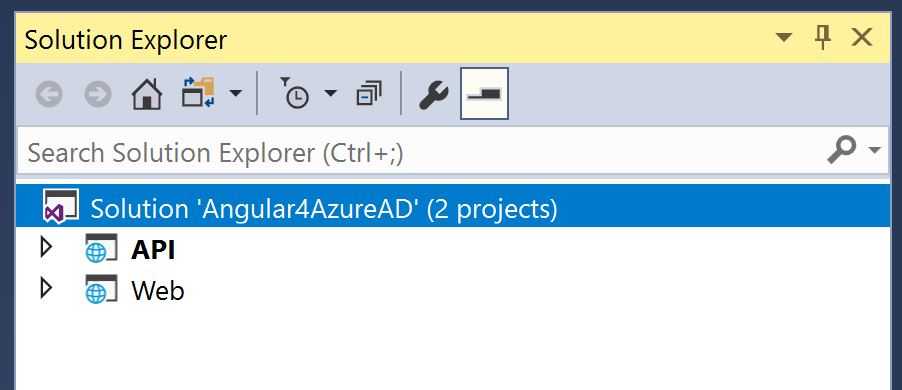
Then create an empty web project and use whatever name you like. For now I’ve used API and Web as my preferred names. Your project structure should look something like this by now:
Configuring the required services
Once done open your Startup.cs file and navigate to ConfigureServices method. If you are wondering why please read my previous post on the changes in ASP.NET Core 2.0.
Before we can setup our authentication we need to setup our configuration with the values you gathered when setting up the active directory and the web API application (refer to my previous post). Open your appsettings.json and add these lines:
"AzureAd": {
  "AADInstance": "https://login.microsoftonline.com/",
  "ClientId": "ca81dd3d-4cd9-4b50-b451-74df7f8838d5",
  "TenantId": "db9af0e4-03ec-439b-a75b-01c54a5c9a04"
}
{: .box-note} Note: remember to replace the application and tenant Id with yours.
Now navigate to ConfigureServices method and add the authentication and authorisation services options as below:
// Add Authentication services.
//Configure Auth
var clientId = Configuration["AzureAd:ClientId"];
var tenantId = Configuration["AzureAd:TenantId"];
var issuer = $"https://sts.windows.net/{tenantId}/";

var serviceProvider = services.BuildServiceProvider();
var loggerFactory = serviceProvider.GetService<ILoggerFactory>();

services.AddAuthentication(JwtBearerDefaults.AuthenticationScheme)
    .AddJwtBearer(options => {
        options.Authority = "https://login.microsoftonline.com/common/";
        options.TokenValidationParameters = new TokenValidationParameters
        {
            ValidateIssuer = true,
            ValidIssuer = issuer,
            ValidateAudience = true,
            ValidAudiences = new string[] { clientId },
            ValidateLifetime = true
        };
        options.Events = new MyJwtBearerEvents(loggerFactory.CreateLogger<MyJwtBearerEvents>());
        options.SaveToken = true;
    });

services.AddAuthorization();
To give you a bit of an intro to the code, we first retrieve the Azure AD configuration. Afterwards, we get an instance of ILogger for logging purposes (you can skip this part if you like but you have to remove it from event handler as well).
That done, we add the authentication to services instance and set a default scheme (in this case I am using JwtBearer). Then have to configure our preferred option. This part is very straight forward so I am not going through the whole code.
You can find the code for MyJwtBearerEvents here.
It’s time to let ASP.NET Core know it should use authentication. This is an important step since without it the whole setup won’t work. Head to Configure method and add the middleware:
app.UseAuthentication();We’re done with configuration at this point, time to secure our API. I’ve got a ValuesController which I will add the Auhorize attribute to it:
using System.Collections.Generic;
using Microsoft.AspNetCore.Mvc;
using Microsoft.AspNetCore.Authorization;

namespace API.Controllers
{
  [Route("api/[controller]")]
  [Authorize]
  public class ValuesController : Controller
  {
    // GET api/values
    [HttpGet]
    public IEnumerable<string> Get()
    {
      return new string[] { "value1", "value2" };
    }

    //... other methods
  }
}
Creating the client side
Alright, now that the server side is secured, let set up our client side to use Azure AD authentication.
We will start by initialising our project. Head to Web folder and open a console (you will need to have nodejs, npm and AngularCLI installed globally). Run this command to create an application (I am using skip install flag because I need to add some packages before installing the default ones):
ng new spa --skip-installNow go to spa folder and cut and paste everything to root of the Web folder (this is for simplicity and ease of use). Lets add all the required packages by adding them to package.json file. Open it up and add these lines to dependencies section:
"adal-angular4": "^1.1.10",
"bootstrap": "^3.3.7",
The first package is a wrapper around adal which is used to authenticate to Azure Active Directory. I will show you how we use it later.
Now run:
npm installOnce finished, we need to define some routes for the application so we can secure a particular one. Protecting routes is a very common task when building applications, as we want to prevent our users from accessing areas that they’re not allowed to access, or, we might want to ask them for confirmation when leaving a certain area. Angular router provides a feature called Route Guards that try to solve exactly that problem.
Here is how our guard looks like:
import { Injectable } from '@angular/core';
import { Observable } from 'rxjs/Observable';
import { Router, CanActivate, CanActivateChild,
  ActivatedRouteSnapshot, RouterStateSnapshot,
  NavigationExtras }
from '@angular/router';
import { Adal4Service } from 'adal-angular4';

@Injectable()
export class AuthGuard implements CanActivate, CanActivateChild {

  constructor(
    private router: Router,
    private adalSvc: Adal4Service
  ) { }

  canActivate(route: ActivatedRouteSnapshot, state: RouterStateSnapshot): boolean {
    if (this.adalSvc.userInfo.authenticated) {
      return true;
    } else {
      this.router.navigate(['/login'], { queryParams: { returnUrl: state.url } });
      return false;
    }
  }

  canActivateChild(childRoute: ActivatedRouteSnapshot, state: RouterStateSnapshot): boolean {
    return this.canActivate(childRoute, state);
  }
}
As you can see I am using one of the packages we added earlier which helps configure our application to authenticate to Azure AD.
Now that we have our guard, let create our routing (I’ve already added three components to the application called home, login and values):
import { Routes, RouterModule } from '@angular/router'
import { HomeComponent } from './components/home/home.component'
import { LoginComponent } from './components/login/login.component'
import { AuthGuard } from './services/authguard.service'
import { ValuesComponent } from './components/values/values.component'

const appRoutes: Routes = [
  { path: '', component: HomeComponent },
  { path: 'login', component: LoginComponent },
  { path: 'values', component: ValuesComponent, canActivate: [AuthGuard] },
  // otherwise redirect to home
  { path: '**', redirectTo: '' },
]

export const routing = RouterModule.forRoot(appRoutes)
Now we can add our routing module to our application. Open the app.module.ts file and import and add router to it:
import { routing } from './app-routing';
...
imports: [
  routing
]
We will need a login component which will handle the unauthorised requests:
import { Component } from '@angular/core';
import { ActivatedRoute, Router } from '@angular/router';
import { Adal4Service } from 'adal-angular4';

@Component({
  selector: 'app-login',
  templateUrl: './login.component.html',
  styleUrls: ['./login.component.css']
})
export class LoginComponent {

  constructor(
    private route: ActivatedRoute,
    private router: Router,
    private adalSvc: Adal4Service
  ) { }

  login(): void {
    const returnUrl = this.route.snapshot.queryParams['returnUrl'] || '/';

    if (this.adalSvc.userInfo.authenticated) {
      this.router.navigate([returnUrl]);
    } else {
      this.adalSvc.login();
    }
  }

}
Very straightforward, we just call login method on clicking a button. Of course you can do it on load without need to have a button, this will just makes debugging a bit easier.
At this point let’s add the Azure configuration to our app. First we need to define the same Azure configuration that we used for our ASP.NET Core application. So head to your environments.ts and add them:
export const environment = {
  production: false,
  azureConfig: {
    tenant: 'tenantname.onmicrosoft.com',
    clientId: 'ca81dd3d-4cd9-4b50-b451-74df7f8838d5',
    postLogoutRedirectUri: 'http://localhost:4200/',
  },
}
The adal-angular4 requires the tenant Id and client id (which is the same as application id) and a post back URL. Remember that we’ve set the same when creating the application on Azure AD.
Alright, time to initialise this service. Open up your app.component.ts file and import the Adal4Service from this package, then call init method and pass the above config to it:
import { Adal4Service } from 'adal-angular4';
import { Router } from '@angular/router';
import { environment } from '../environments/environment';

export class AppComponent implements OnInit {
  isLoggedIn: boolean = false;

  constructor(private adalSvc: Adal4Service, private router: Router) {
    this.adalSvc.init(environment.azureConfig);
  }

  ngOnInit(): void {
    this.adalSvc.handleWindowCallback();
    this.isLoggedIn = this.adalSvc.userInfo.authenticated;
  }

  logout(): void {
    this.adalSvc.logOut();
  }
}
Because of that post back URL we’ve defined, we also need to handle the login callback coming from Azure AD. We do this by calling handleWindowCallback from the aforementioned service on init.
Let’s define the HTML for the app component as well:
<nav class="navbar navbar-inverse">
  <div class="container-fluid">
    <div class="navbar-header">
      <a class="navbar-brand" href="#">SPA App with Azure AD login</a>
    </div>
    <ul class="nav navbar-nav">
      <li><a [routerLink]="['/']">Home</a></li>
      <li><a [routerLink]="['/values']">Values</a></li>
    </ul>
    <ul class="nav navbar-nav navbar-right">
      <li *ngIf="!isLoggedIn">
        <a [routerLink]="['/login']"
          ><span class="glyphicon glyphicon-log-in"></span> Login</a
        >
      </li>
      <li *ngIf="isLoggedIn">
        <a (click)="logout()"
          ><span class="glyphicon glyphicon-log-out"></span> Logout</a
        >
      </li>
    </ul>
  </div>
</nav>

<div class="container-fluid">
  <div style="padding-top: 61px;"></div>
  <router-outlet></router-outlet>
</div>
It is very simple. We have a menu which is pointing to our routes, a login/logout button which is shown based on user current status, and the router outlet which will load the correspondent component.
Let’s create our services which are required to finish our application. First we will need a base service which can extract the token from user object and add it to request header as bearer token:
import { Http, Response, Headers } from '@angular/http';
import { Inject, Injectable } from '@angular/core';

import 'rxjs/Rx';
import { Observable } from 'rxjs/Observable';
import 'rxjs/add/observable/throw';
import { Observer } from 'rxjs/Observer';
import 'rxjs/add/operator/map';
import 'rxjs/add/operator/catch';

import { Adal4Service } from 'adal-angular4';
import { APP_CONFIG, AppConfig } from '../app.constants';

@Injectable()
export class SecureHttpService<T> {
  headers: Headers;

  constructor(private http: Http, private apiEndPointUrl: string, private adalService: Adal4Service) {

    this.headers = new Headers({ 'Content-Type': 'application/json' });
    let jwt = this.adalService.userInfo.token;
    this.headers.append('Authorization', 'Bearer ' + jwt);
  }

  getAll(): Observable<any> {
    return this.http.get(this.apiEndPointUrl, { headers: this.headers }).map(
      (res: Response) => {
        return res.json() as any[];
      }).catch(this.handleError);
  }

  get(id: number): Observable<any> {
    return this.http.get(this.apiEndPointUrl + '/' + id).map((value, i) => {
      return <T>value.json()
    })
      .catch(this.handleError);
  }

  private handleError(error: any) {
    console.error('server error:', error);
    if (error instanceof Response) {
      let errMessage = '';
      try {
        errMessage = error.json().error;
      } catch (err) {
        errMessage = error.statusText;
      }
      return Observable.throw(errMessage);
    }
    return Observable.throw(error || 'server error');
  }
}
I am using a generic class which can be used later using TypeScript features (which I love). In the constructor we need an instance of HTTP service, the base URL and the Adal4Service to extract the token from.
Now let’s add our values service:
import { Injectable, Inject } from '@angular/core'
import { Http } from '@angular/http'
import { APP_CONFIG, AppConfig } from '../app.constants'
import { Adal4Service } from 'adal-angular4'
import { SecureHttpService } from './secure-http.service'

@Injectable()
export class ValuesService extends SecureHttpService<string> {
  constructor(
    http: Http,
    @Inject(APP_CONFIG) appConfig: AppConfig,
    adalService: Adal4Service
  ) {
    super(http, appConfig.baseUrl + 'values', adalService)
  }
}
Now you know what was the benefit of having that generic class, it’s superb isn’t it?
The source code for that is very simple:
import { InjectionToken, NgModule } from '@angular/core'

export class AppConfig {
  baseUrl: string
}

export const APP_CONSTANTS: AppConfig = {
  baseUrl: 'http://localhost:4200/api/',
}

export let APP_CONFIG = new InjectionToken() < AppConfig > 'app.config'

@NgModule({
  providers: [
    {
      provide: APP_CONFIG,
      useValue: APP_CONSTANTS,
    },
  ],
})
export class AppConfigModule {}
Alright, time to consume the values service in the values component:
import { Component } from '@angular/core';
import { ValuesService } from '../../services/values.service';

@Component({
  selector: 'app-values',
  templateUrl: './values.component.html',
  styleUrls: ['./values.component.css']
})
export class ValuesComponent {
  values: Array<string>;

  constructor(private service: ValuesService) {
    this.service.getAll().subscribe(x => this.values = x);
  }
}
And the HTML:
<div class="col-xs-12">
  <h1>You're in, well done...</h1>
  <div class="well">
    <ul>
      <li *ngFor="let value of values">{{value}}</li>
    </ul>
  </div>
</div>
Finishing touches
It is not time to glue everything together. Open your app.module.ts and add all the services you need (components will get added when you add them using ng g component command):
import { BrowserModule } from '@angular/platform-browser'
import { NgModule } from '@angular/core'
import { Adal4Service, Adal4HTTPService } from 'adal-angular4'
import { HttpModule, Http } from '@angular/http'
import { AppComponent } from './app.component'
import { HomeComponent } from './components/home/home.component'
import { LoginComponent } from './components/login/login.component'
import { ValuesComponent } from './components/values/values.component'
import { AppConfigModule } from './app.constants'
import { AuthGuard } from './services/authguard.service'
import { routing } from './app-routing'
import { ValuesService } from './services/values.service'
import { SecureHttpService } from './services/secure-http.service'

@NgModule({
  declarations: [AppComponent, HomeComponent, LoginComponent, ValuesComponent],
  imports: [BrowserModule, AppConfigModule, HttpModule, routing],
  providers: [
    AuthGuard,
    SecureHttpService,
    ValuesService,
    Adal4Service,
    {
      provide: Adal4HTTPService,
      useFactory: Adal4HTTPService.factory,
      deps: [Http, Adal4Service],
    },
  ],
  bootstrap: [AppComponent],
})
export class AppModule {}
As you can see we’ve provided all the required service we added. Also configured the Adal4HTTPService which then will get used by Adal4Service and specified its dependencies.
Proxy
Since we are using two different project we will need to let Angular CLI know when to delegate the requests to our ASP.NET Core APIs. For that you can simply create a proxy and use it when using ng serve:
{
  "/api": {
    "target": "http://localhost:51009/",
    "secure": false
  }
}
The port defined above need to be the port that is used to lunch you API application. Also you will need to let ng know it should use a proxy. Open your package.json and replace ng serve with:
ng serve --proxy-config proxy.conf.jsonNow run dotnet run in root of APIs and run npm start from the root of the Web folder. And it is all done. When you click on values menu you will be redirected to your Azure AD where you can login and then you will be redirected back to your application and the values will be loaded.
Hope you will benefit from this post and remember to spread it (short link) where you see fit.
Again the complete source code can be found on my GitHub repository.
Hope you’ve enjoyed this article.
 Crypto