

Setting up VSTS CI/CD for a SPA app using AngularCLI, ASPNetCore (Part 2)
 December 18, 2017
 3 min read
In my previous post I showed you how to setup a build pipeline for a SPA application written in Angular using Angular CLI and ASP.Net Core as back-end. I promised back then to continue with the release as well, but have been pretty busy lately.
Now is the time to pay my debt and show you how you will get the release done to make it a proper continuous delivery right from when you commit the code to when it is deployed to production.
We will be using Azure Web Apps for our deployment purposes but it really doesn’t matter where you deploy it since there are many third party tools covering different providers like AWS.
Create the release definition
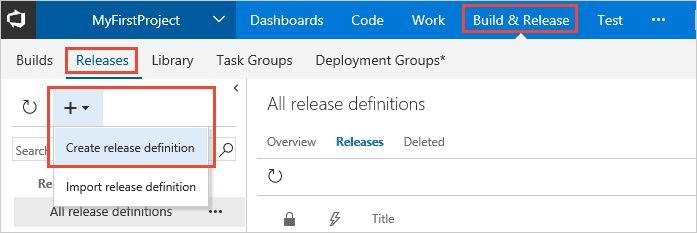
You can create a release in VSTS in two easy ways, either click on the release tab and create a new release definition:
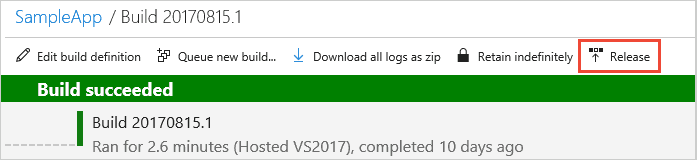
or if you have a successful build click on the release button next to it and it will then brings you to the same page but automatically links it to the build definition’s output artefact:
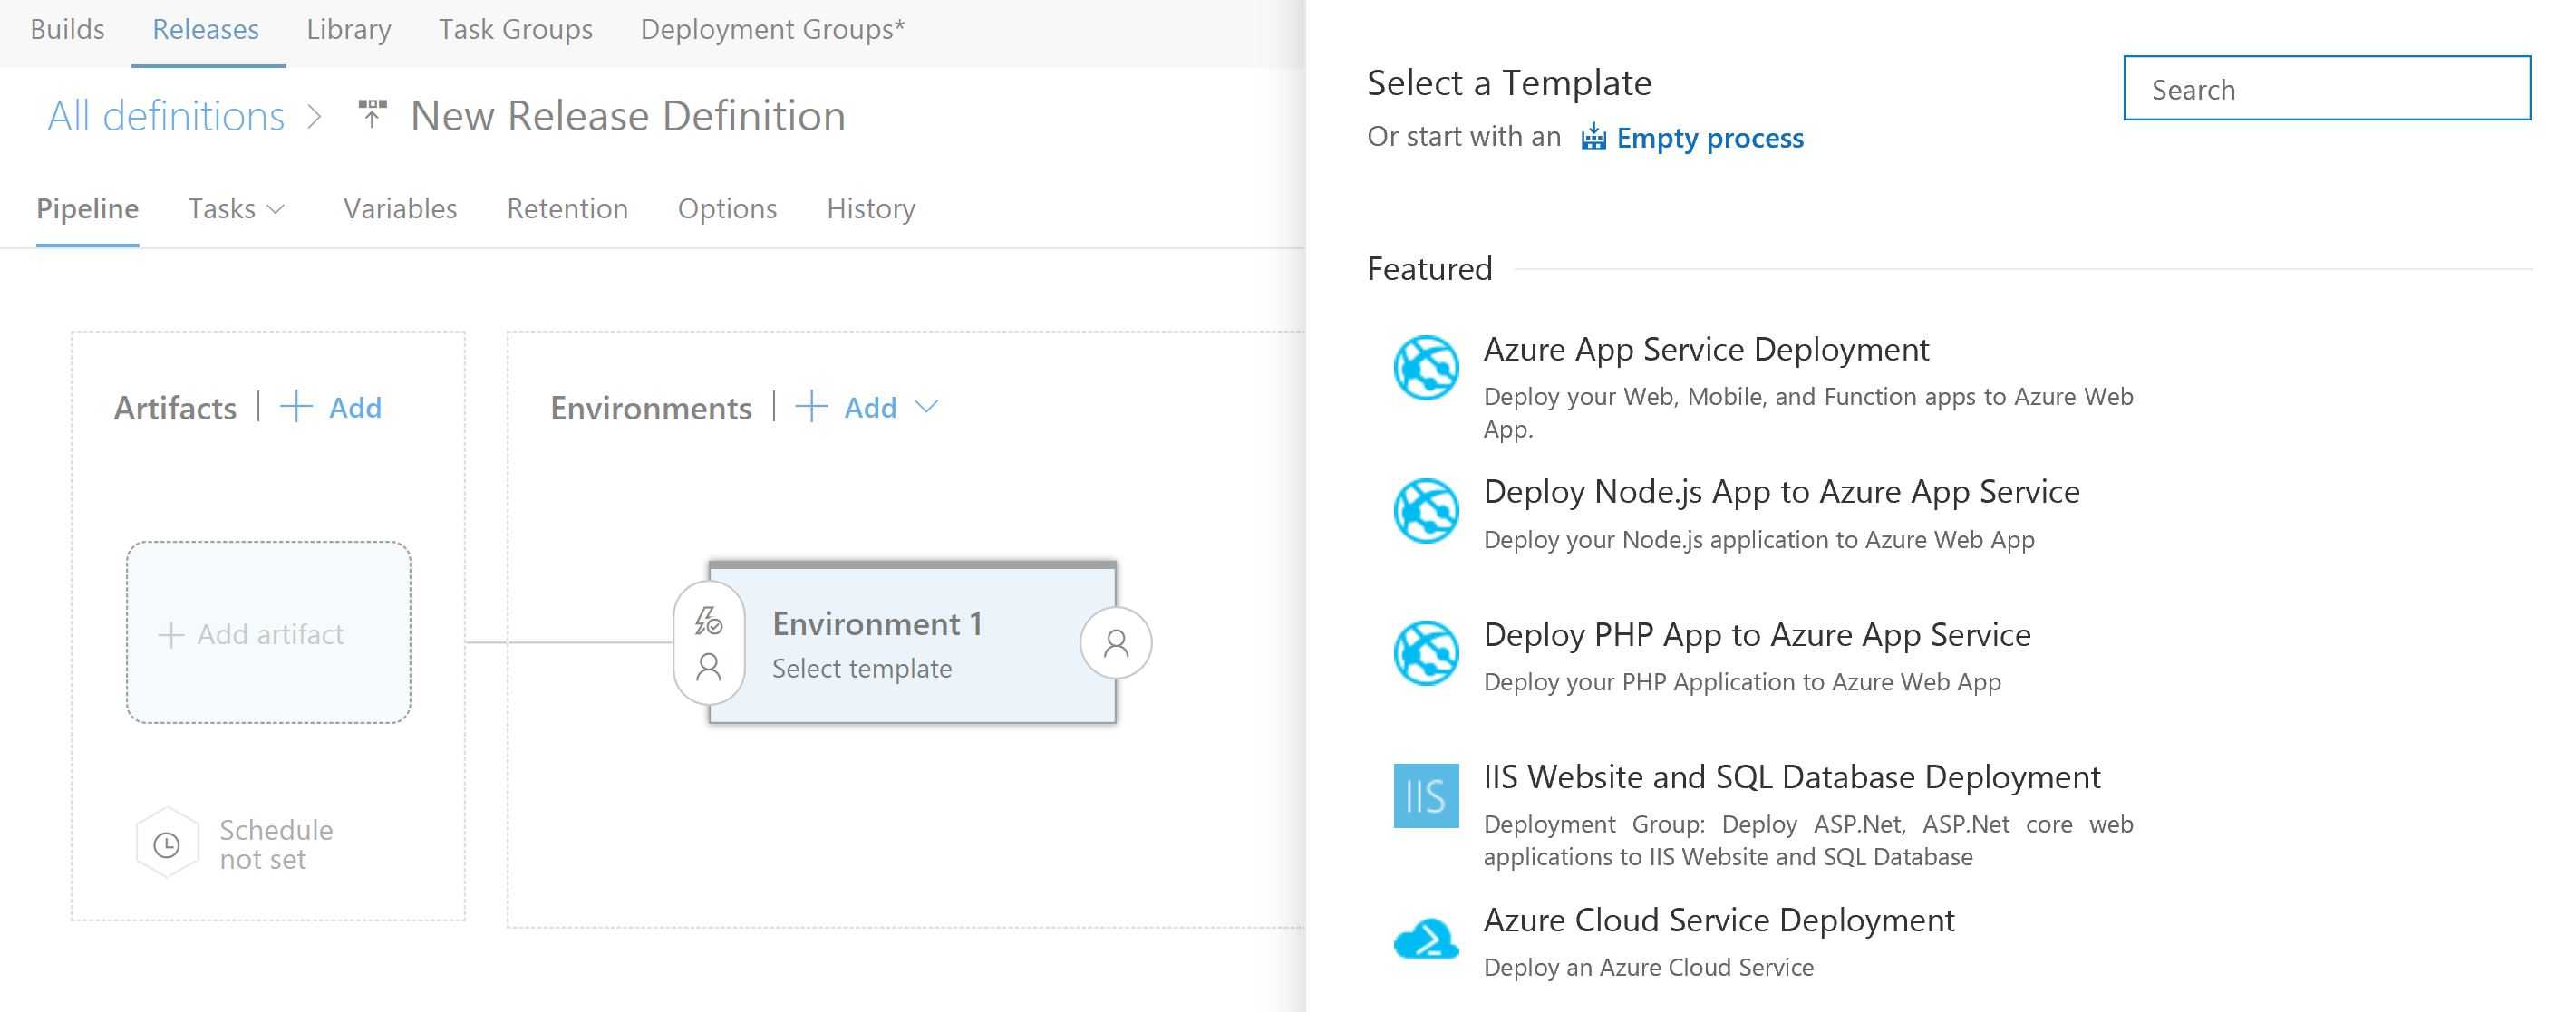
The easiest way to create the release definition is based on a template. The best template for our purpose is Azure App Service Deployment, which is very straightforward to use. When you click on create new release definition you will see below pop up:
Select the first option and you will be asked to enter a name for the environment you are deploying to:
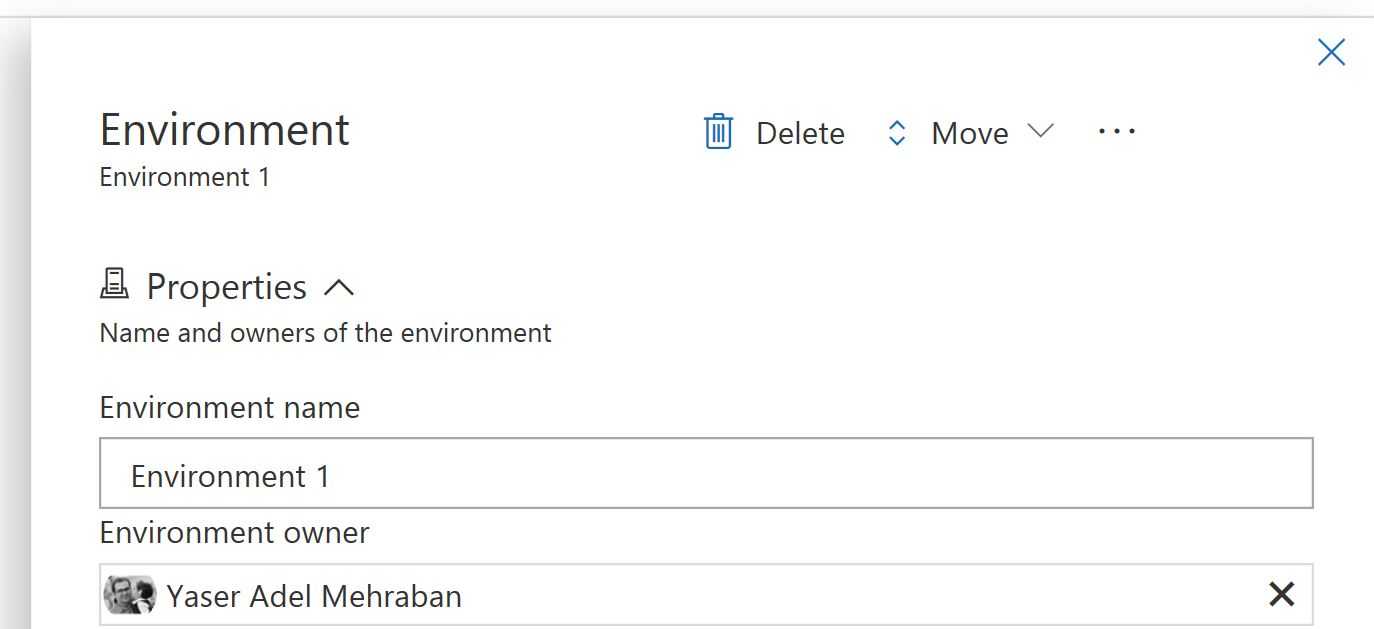
Enter the name and close the panel by clicking on the x mark (there is no save button here).
Linking the build artefact
Now it is time to add the build artefact to the release. Click on add artefact button and you will see below pop up:
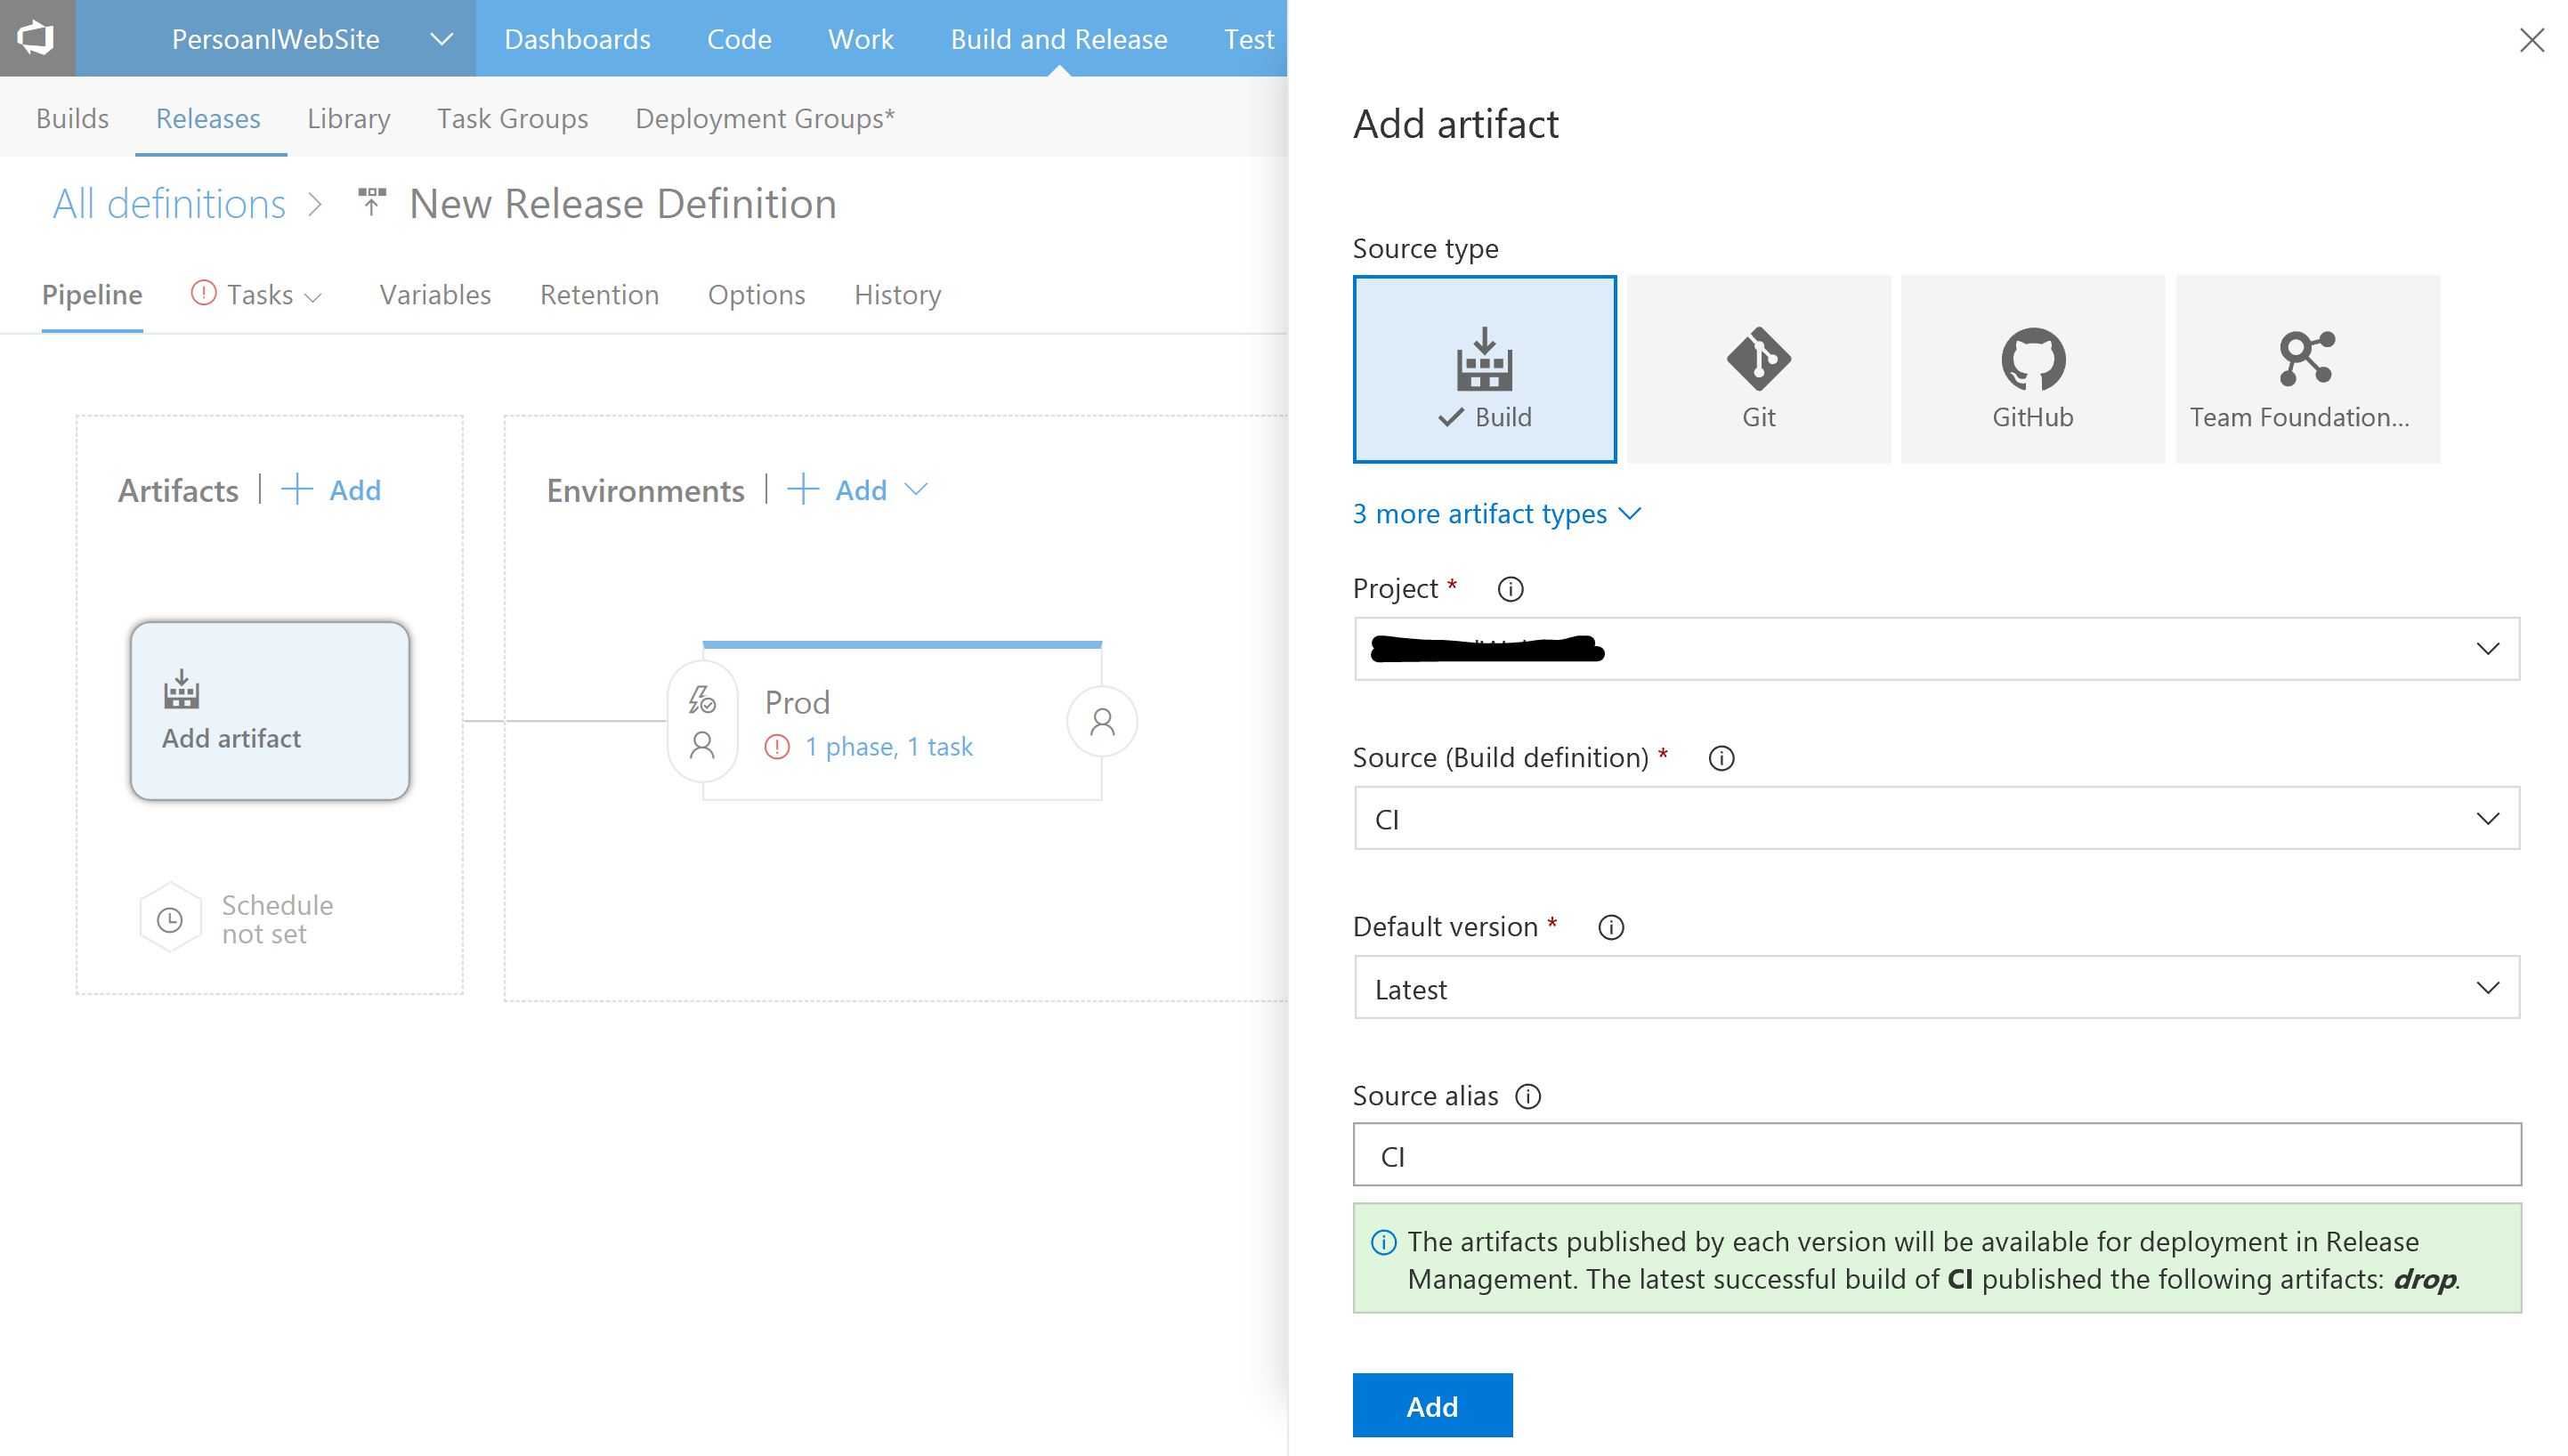
Select the project and the list of builds will be populated with all the available builds. Select the one you are after and select latest as the version. Then give it a source alias (this is an identifier - typically a short name - that uniquely identifies an artefact linked to a a release definition). Now select add and that’s it we have linked the build output to the release.
Setting the deployment condition
Now it is time to set the deployment condition, I will use automatic deployment which is turned off by default. Click on the little trigger button on top of the artefact:

Click on enable to for continuous deployment. Add the source branch (master, prod, etc.) which means it will only trigger the release if the source branch is the one you select here. Close the panel and we’re done in this section.
Release tasks
Before we continue with the release tasks you will need to have the following:
- An instance of Azure Web Apps (refer here to learn how to create one using portal or here to learn how to create and deploy using Visual Studio)
- A service endpoint defined and liked to your Azure Subscription. Refer here for a comprehensive list of endpoints and how to create them.
Now click on the tasks tab and in the environment panel select the service endpoint mentioned above in the Azure Subscription box:
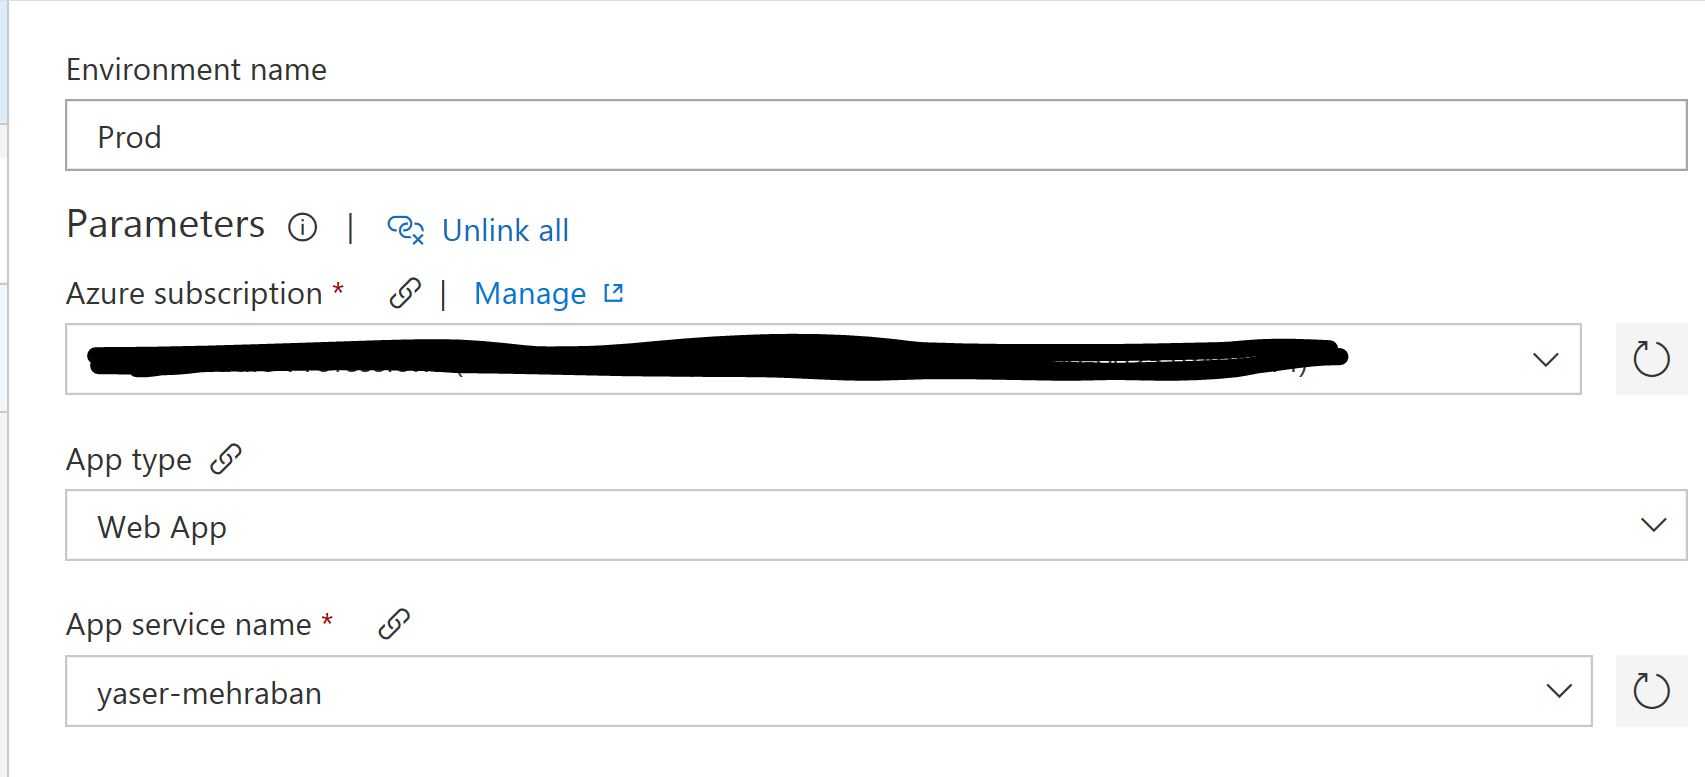
Then select Web App from the app type drop down and select the web app you created from step one above.
VS2017 hosted agent, if you want to use a Linux host you will need to change the settings yourself.Now click on the Deploy Azure App Service task to see the details on the right hand side panel. We will leave the version on this page to remain on 3.* which now supports Supports File Transformations (XDT) and Supports Variable Substitutions(XML, JSON) but if you want to use an older version you can do that.
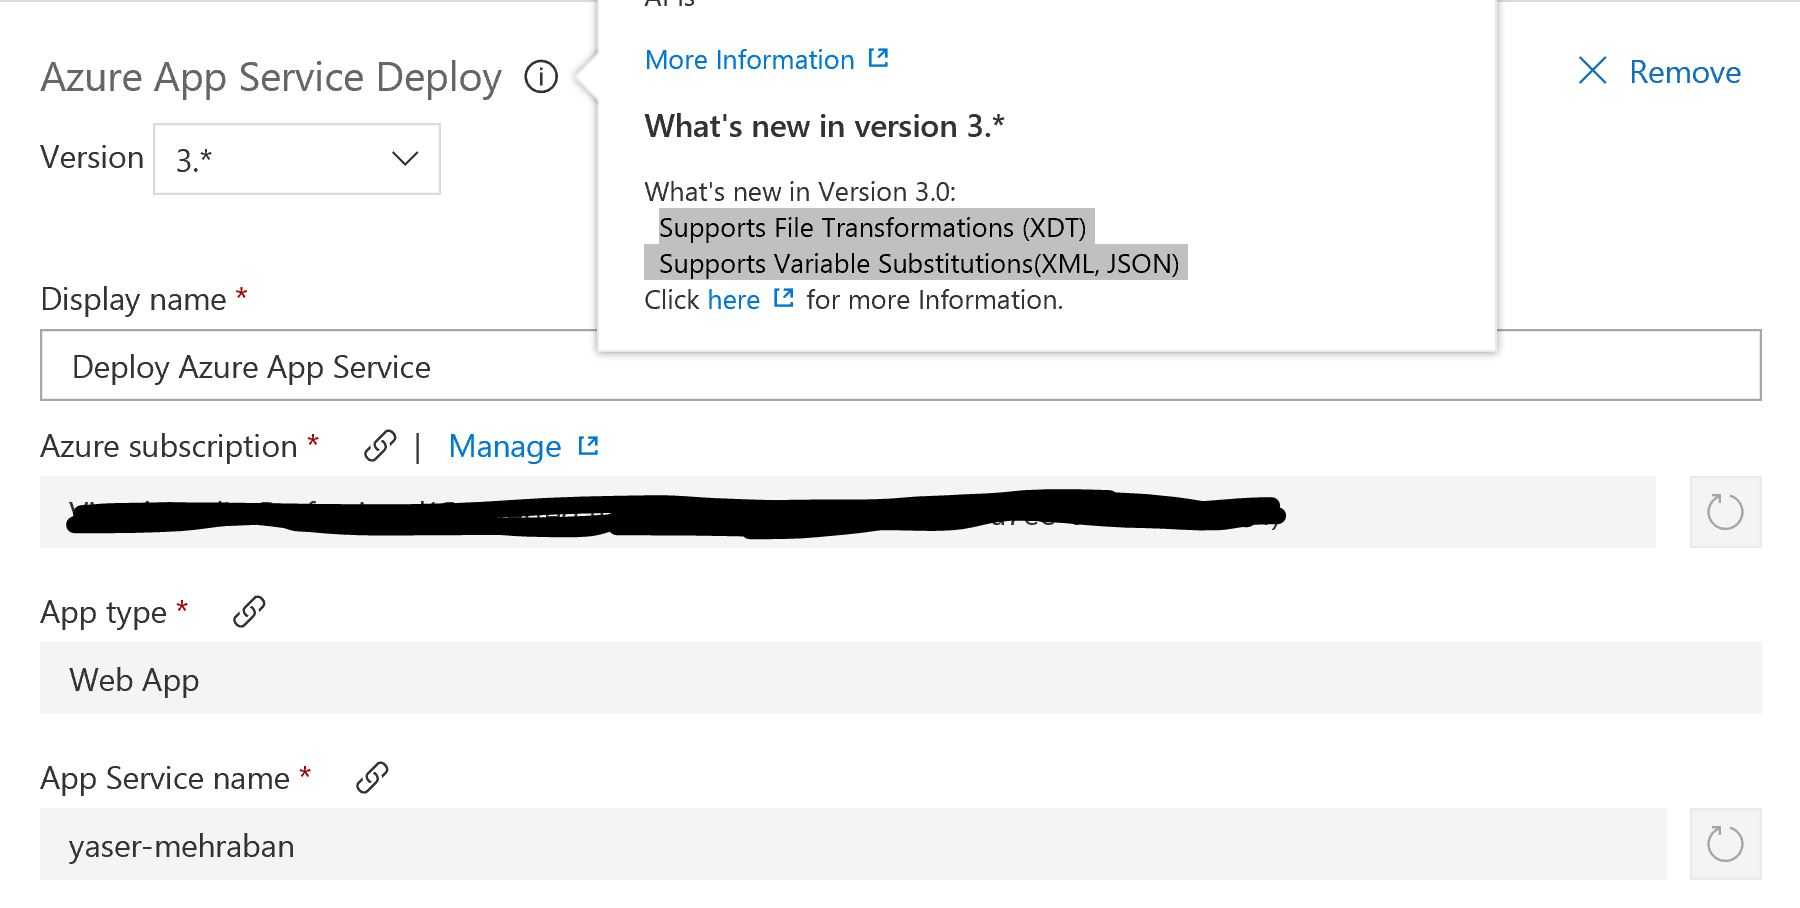
Based on what you’ve selected in the environment section from previous steps, the next three fields will be pre-filled for you.
The next important thing to consider is when you have set up an staging slot for your web app and want to deploy to it first and do some verification before deploying to production which is a logical precaution. If so tick the deploy to staging box.
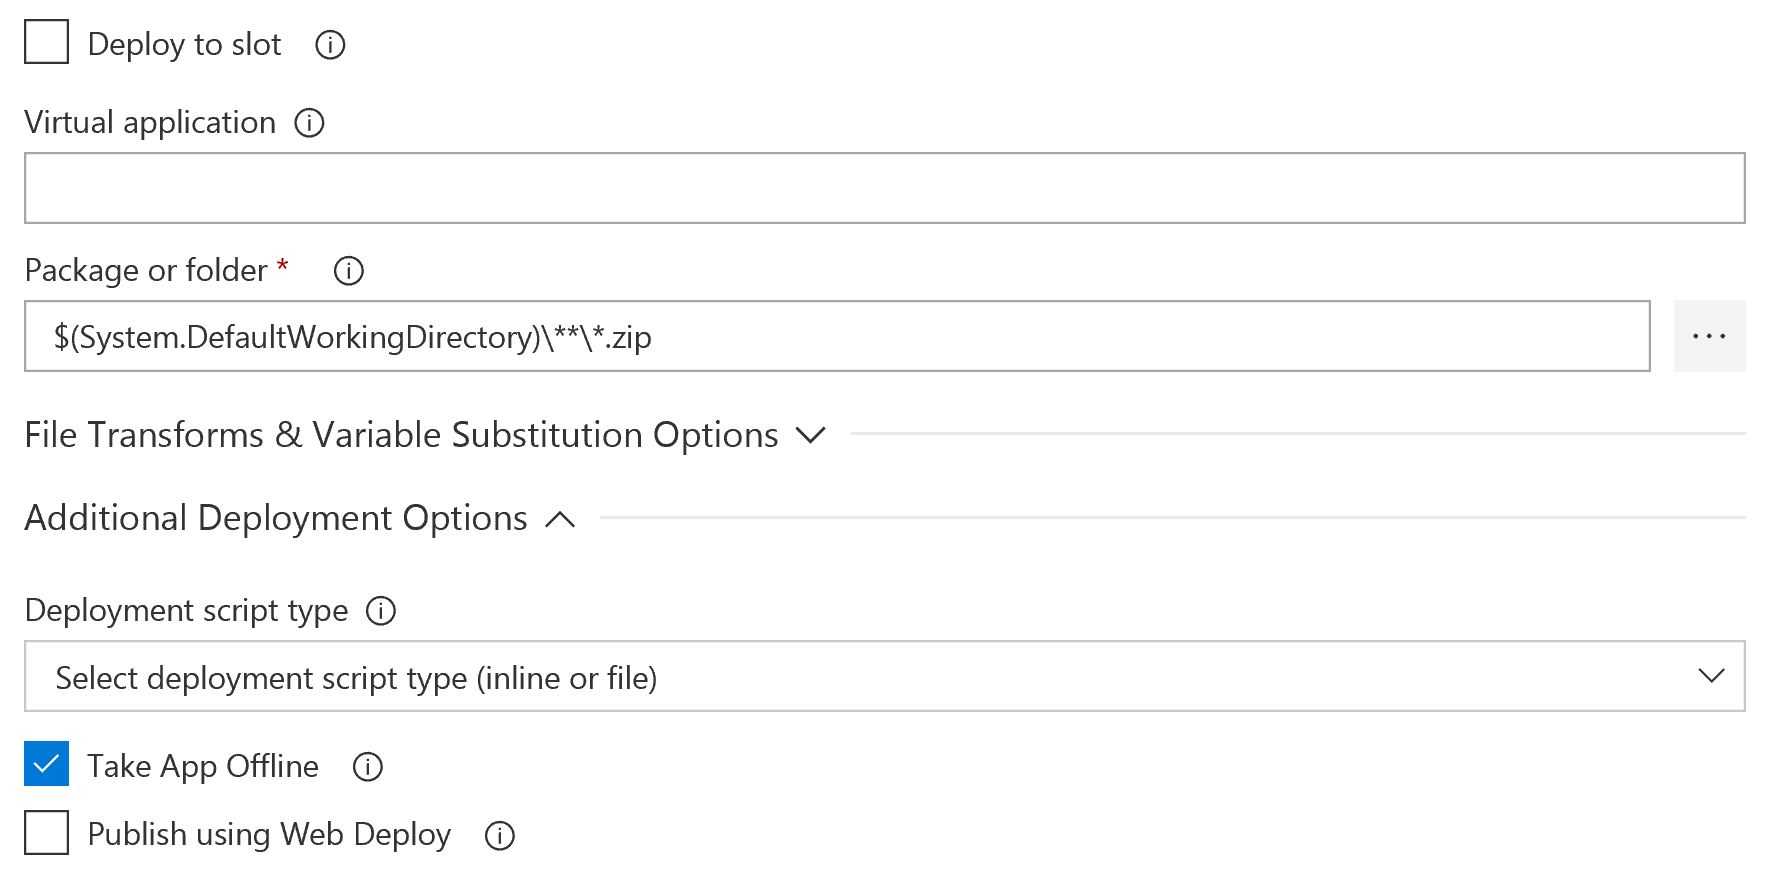
You can leave the package folder intact if the build output is created on the default working folder.
Select the take app offline if you haven’t selected the deploy to slot option (since users might experience some unexpected behaviour if they are using the application).
And at last if you want to use web deploy for reasons like having a dependency on it, you will need to tick publish using web deploy and that’s it.
Click save and queue release if you already have a successful build and there you go, end to end from commit to deployment to the target environment.
Hope this helps you to have a seamless experience using Visual Studio Team Services features for CI/CD.
 Crypto